
Dear Friends,
This post is intended for friends at Elrond  . Both ThreeFold and Elrond share common values and there is an enormous potential that can be exploited together, especially when it comes to leveraging ThreeFold’s peer to peer cloud network .
Elrond introduces two key innovations: a novel Adaptive State Sharding mechanism - enabling parallel transaction processing, and hence linear scalability, and a Secure Proof of Stake (PoS) algorithm - ensuring a fast, efficient, and secure consensus mechanism.
We will quickly demonstrate how to setup a Elrond node on the ThreeFold Grid . The purpose here is to get people started. The configuration can be tweaked to perfection with other experts in the community.
Most of the deployments have a common pattern and just require a change in the underlying flist and inputs. The rest of the process for all deployments is more or less the same.
What we will do ?
- Setup your 3bot and install the 3sdk
- Log in and create your Network
- Get your wallet loaded , don’t worry, we have FreeTFTs
- Deploy your Elrond container
- Access your Elrond container
- Verify your Elrond deployment
Before you start, we have 2 networks publicly available
- Mainnet @ https://explorer.grid.tf
- Testnet @ https://explorer.testnet.grid.tf
Our Recommendation : Start deploying on testnet as ThreeFold gives free nodes to deploy and play around with. Mainnet is production and paid for. Therefore, from settings in the 3sdk menu, switch to TESTNET. Having said that, you can still deploy on our Mainnet too with FreeTFTs on "freefarm"
Step 1 - Setup the 3sdk
The 3sdk is a tool that allows you to setup your 3bot and give you access to the ThreeFold Grid for your deployments (containers, virtual machines, S3 storage and so on). The wiki provides detailed instructions on how to set up the 3sdk .
If this part is done, rest should be extremely easy as management is done via web interface.
To access the 3sdk admin interface, in your browser use the following link,
http://YOUR_IP_HERE:7000 or https://YOUR_IP_HERE:4000
7000 is the http port and 4000 is the https port
If you installed locally on your machine, you can use http://localhost:7000
Step 2 - Log in and Create your Network for Deployment
From the previous step, http://YOUR_IP_HERE:7000
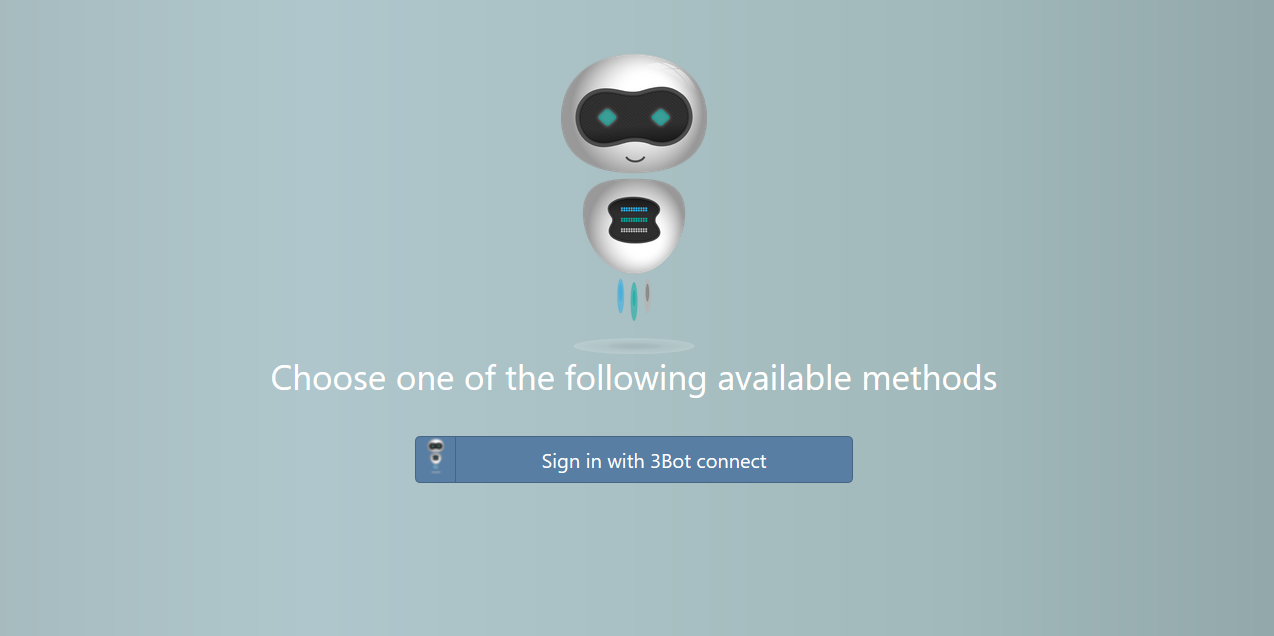
Log in here with your 3bot. Make sure you open the 3bot connect app first!
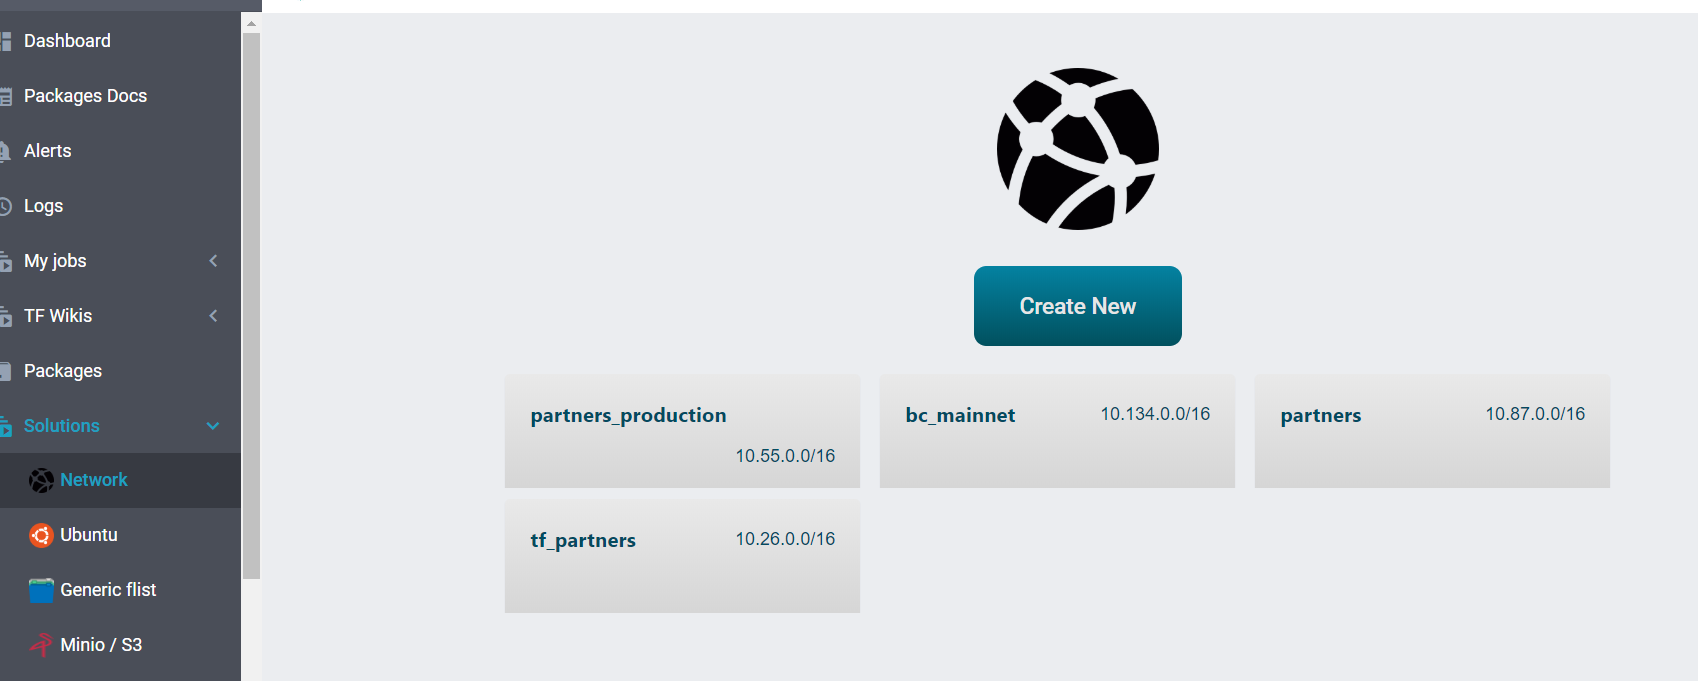
Once you log in, Go to Solutions and then go to Network . The interface is user-friendly and it should be easy. Few things to note,
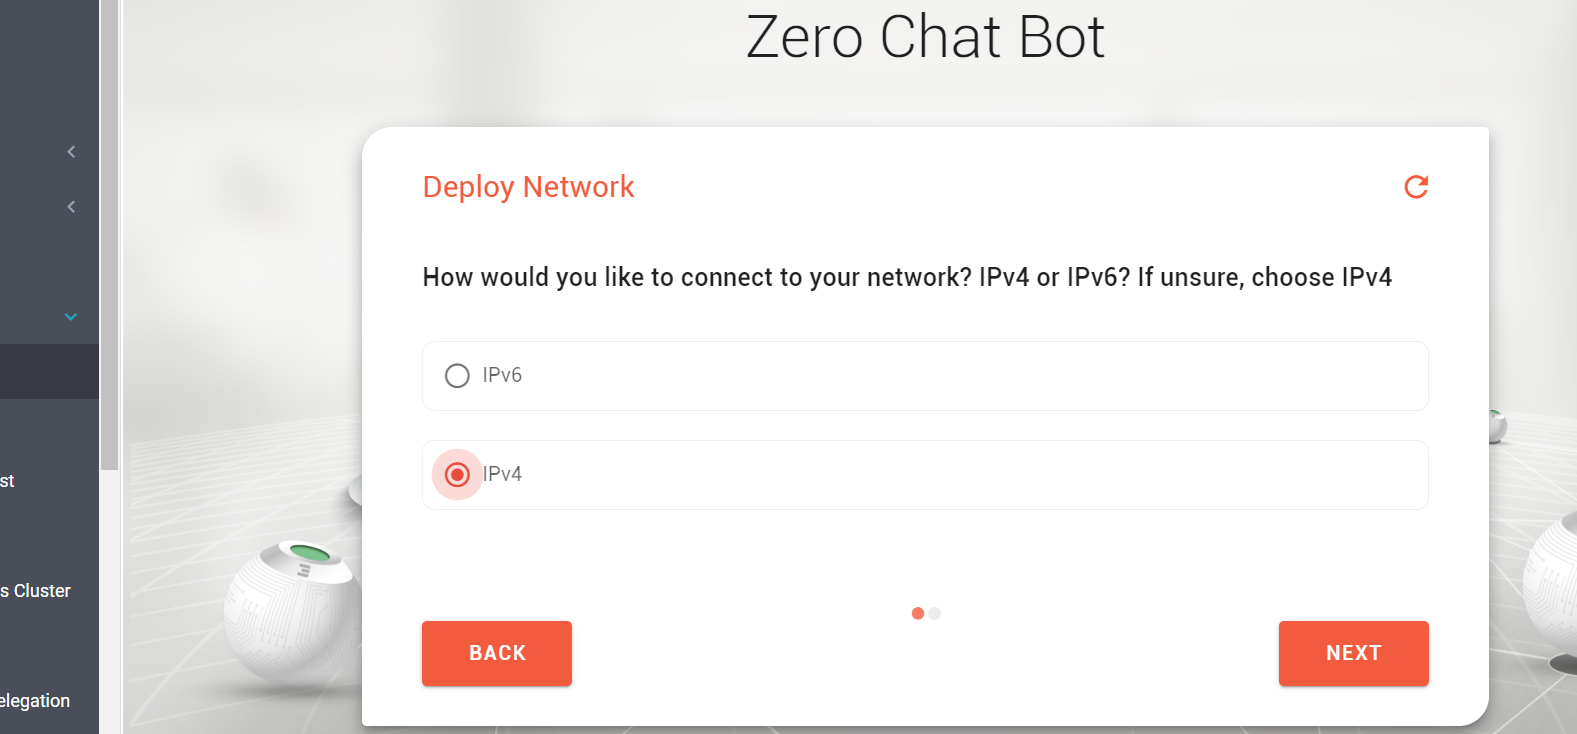
- Use IPv4 network unless you are sure you have IPv6. You can test IPv6 connectivity here
- It is better to have the chat bot configure the network for you unless you have specific requirements
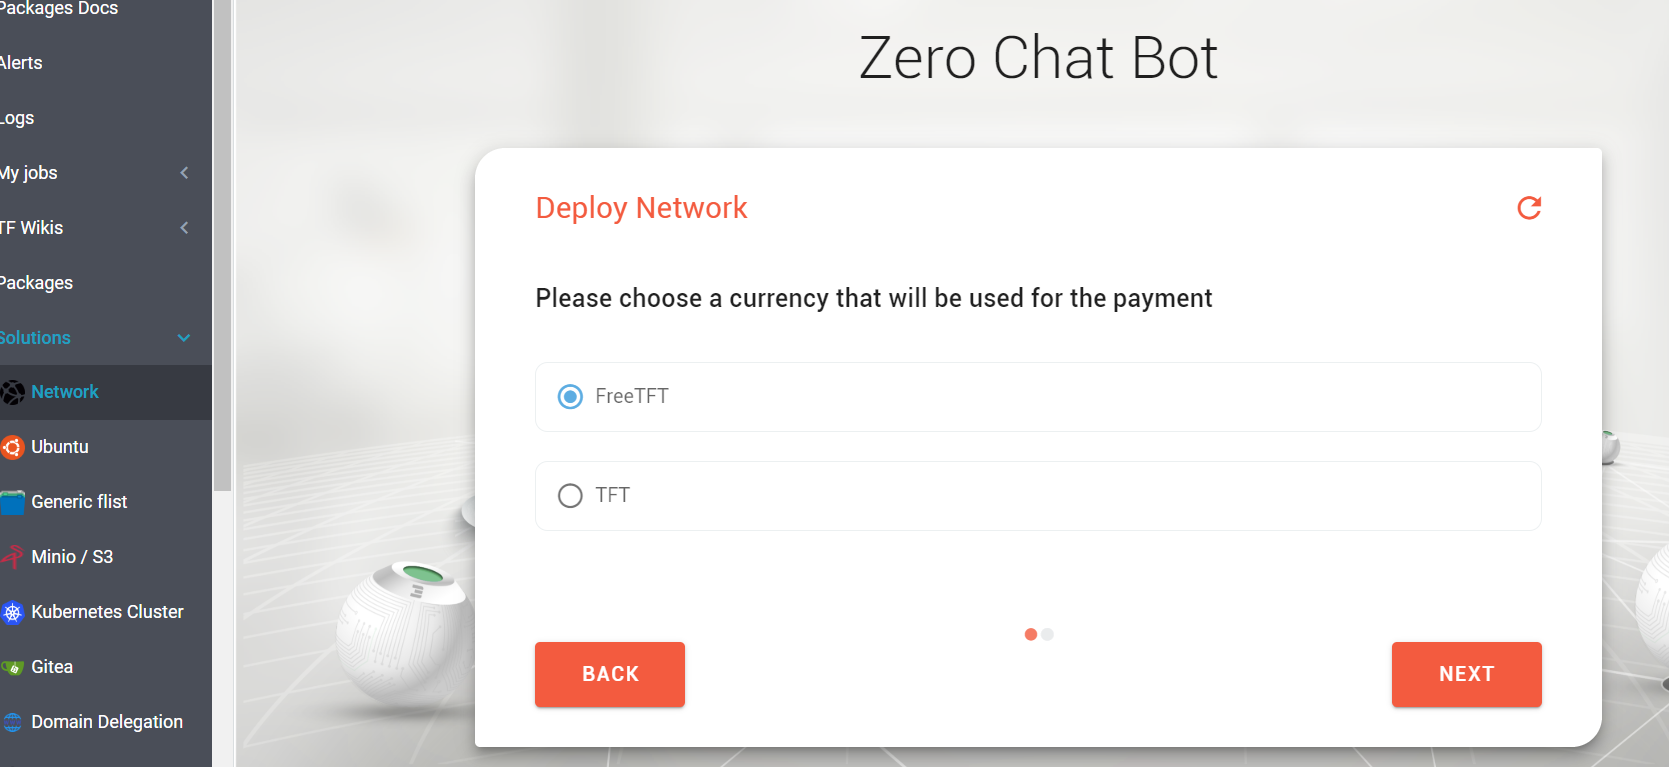
- Ideally start with FreeTFT as your network currency
Now setup the Expiration time
Note : Resources on the ThreeFold Grid are provisioned under a Smart IT Contract . So they will decommission after the expiration. Set the Network to 1 or 3 months or more as you may using it every time you do a deployment.

You can have IPv6 too, but make sure you have IPv6 first. You can test here
Better to have an auto-configured IP range unless you have specific network requirements,
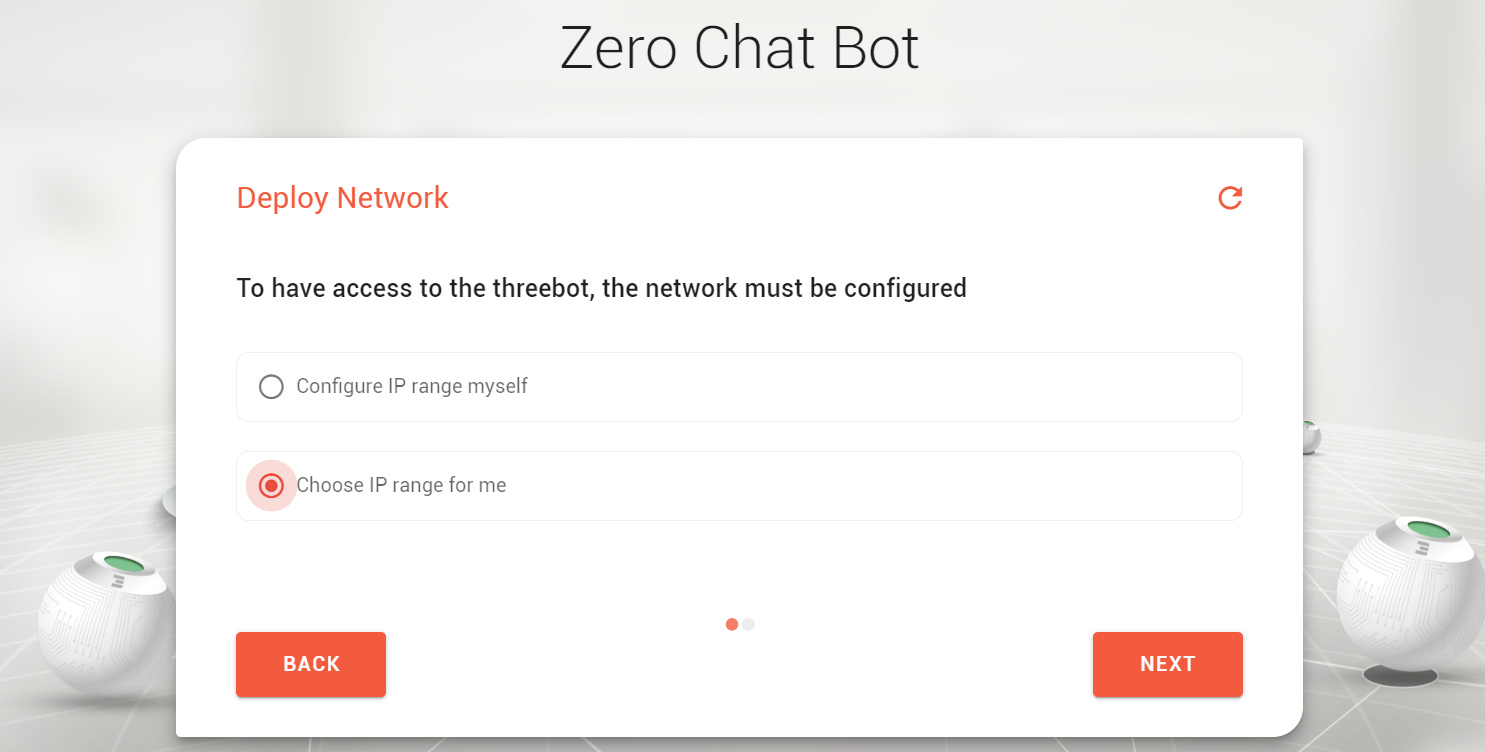
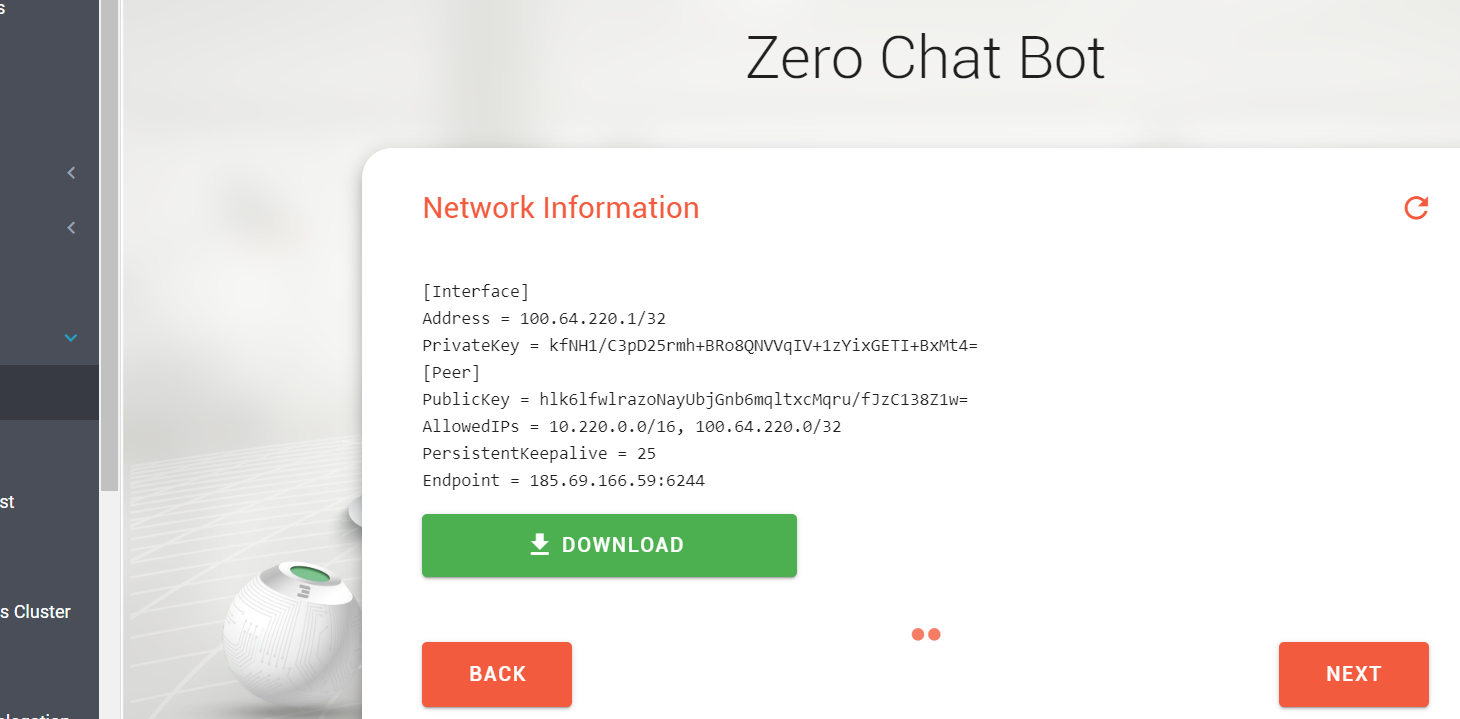
Note : The wizard will ask you to download your Wireguard configuration. This is important as you won’t be able to access your network without it. This serves as an entry point to your private network.
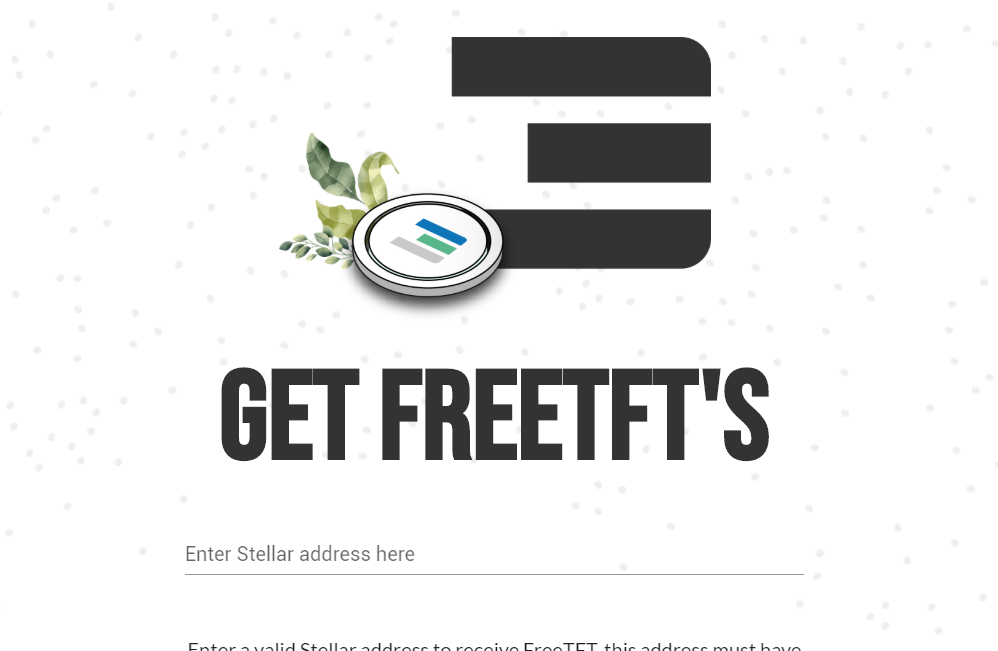
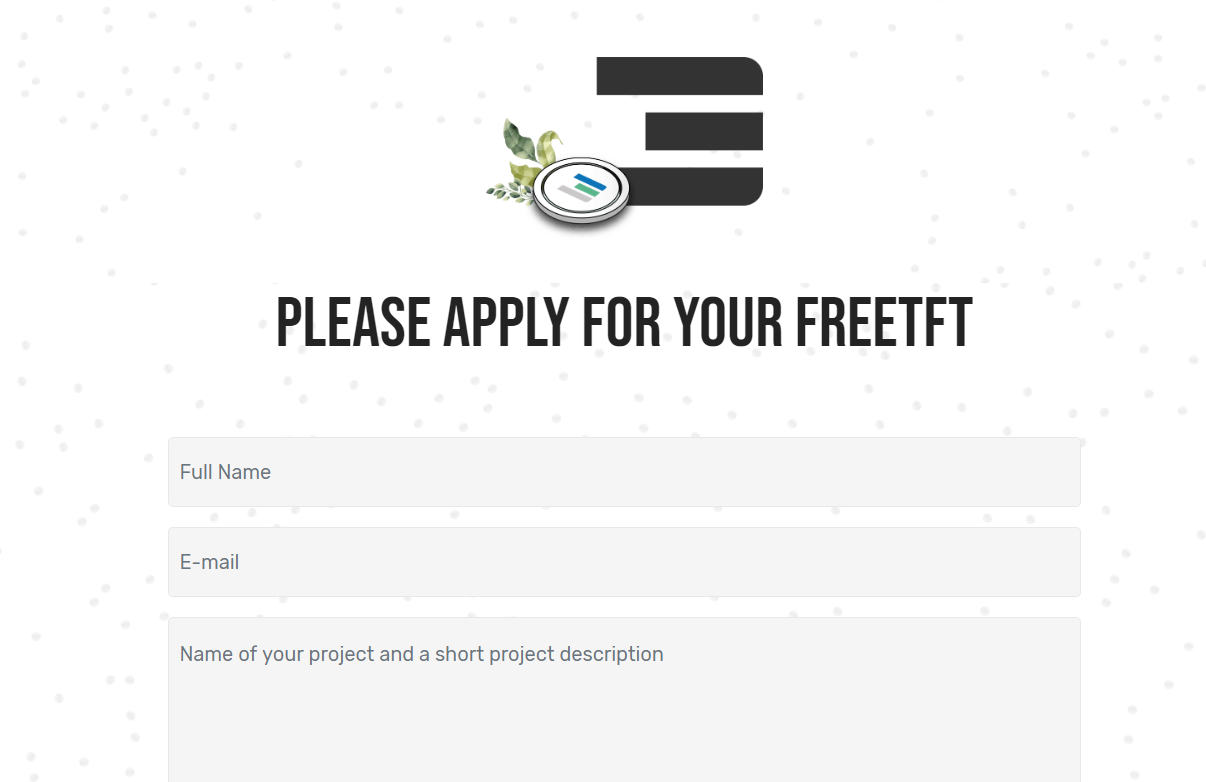
Step 3 : Get your wallet loaded - Get some FreeTFTs
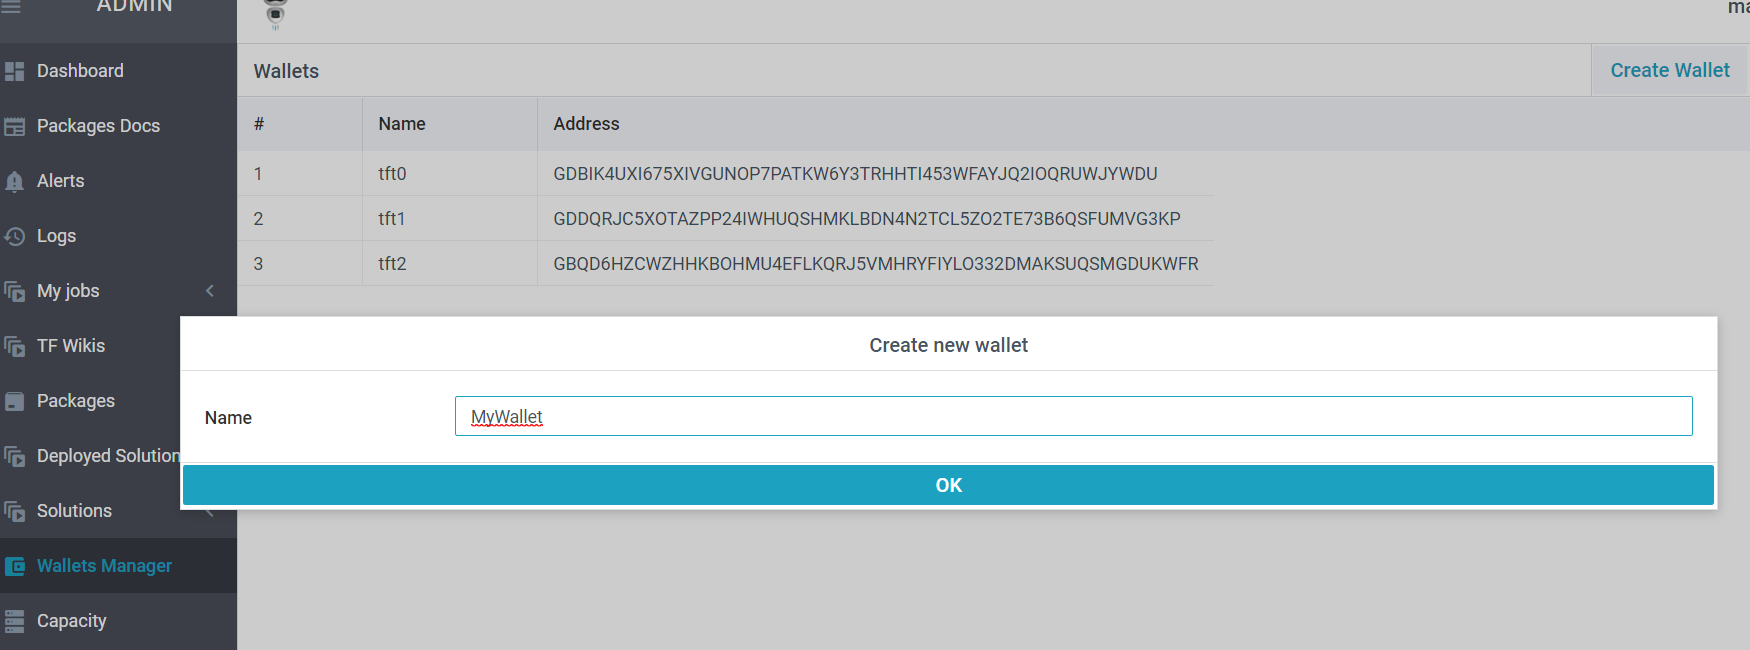
First things first, create a wallet from the Wallet Manager. It is pretty easy actually,
The next step is to get your wallet funded, there are 2 ways,
To get FreeTFTs for testnet, use this link => https://getfreetft.testnet.threefold.io
Login with your 3botID which you created in the 1st step and provide the wallet address. You get 1000 FreeTFTs per wallet. This should be adequate ! The stellar address is the simply the wallet address. Our transaction layer is on stellar.
To get FreeTFTs for Mainnet, use this request form => https://www.getfreetft.threefold.io
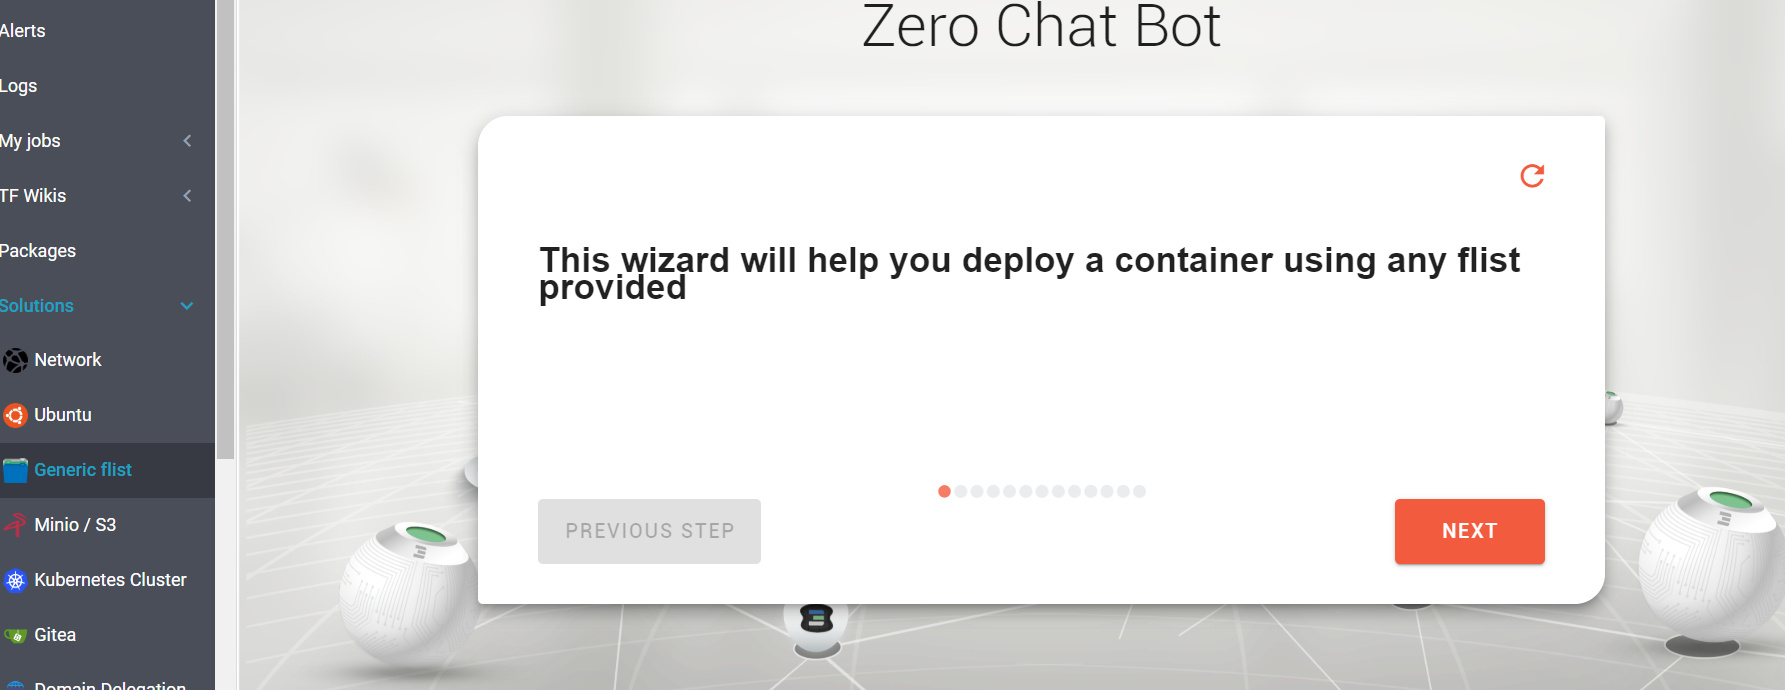
Step 4 - Create your Elrond Container - It is show time 
Under Solutions , go to Generic flists , the wizard will guide you accordingly.
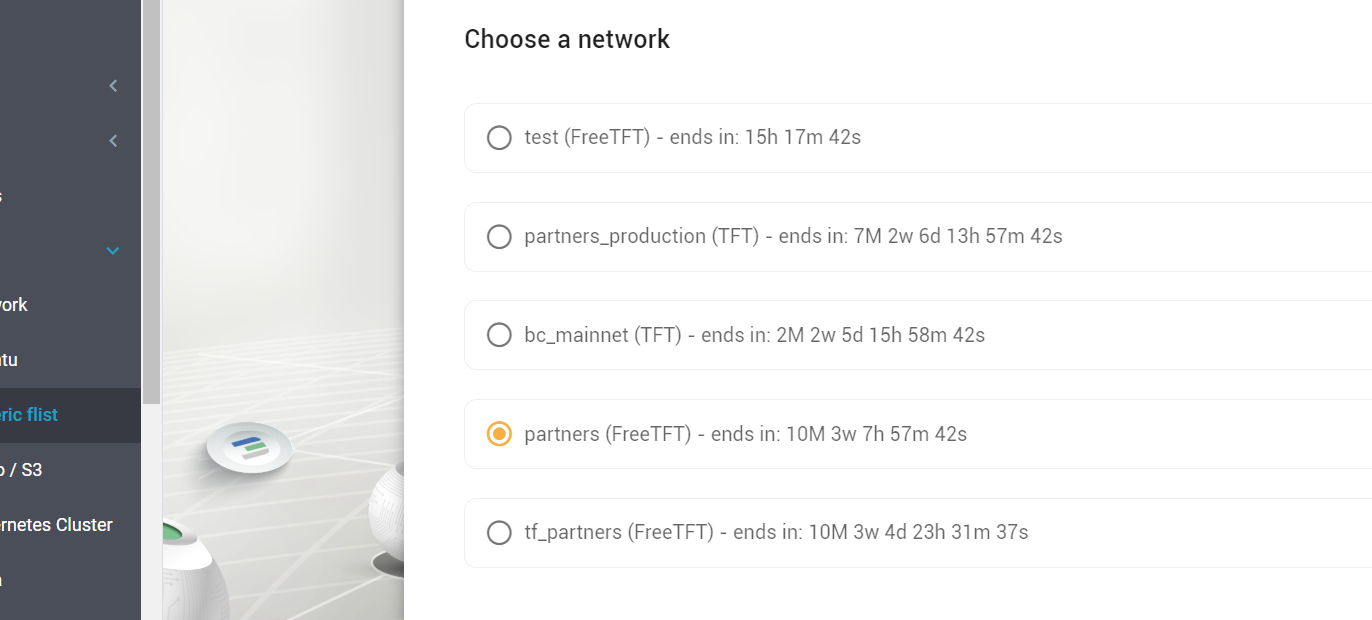
- Select the network name which you created . Your container is going to be deployed in this network.
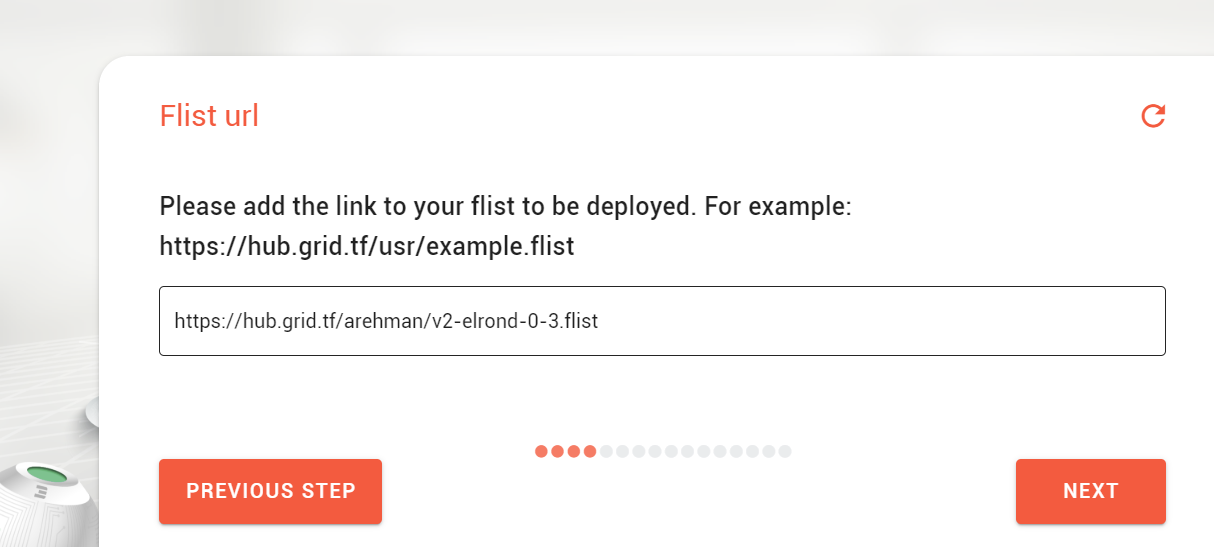
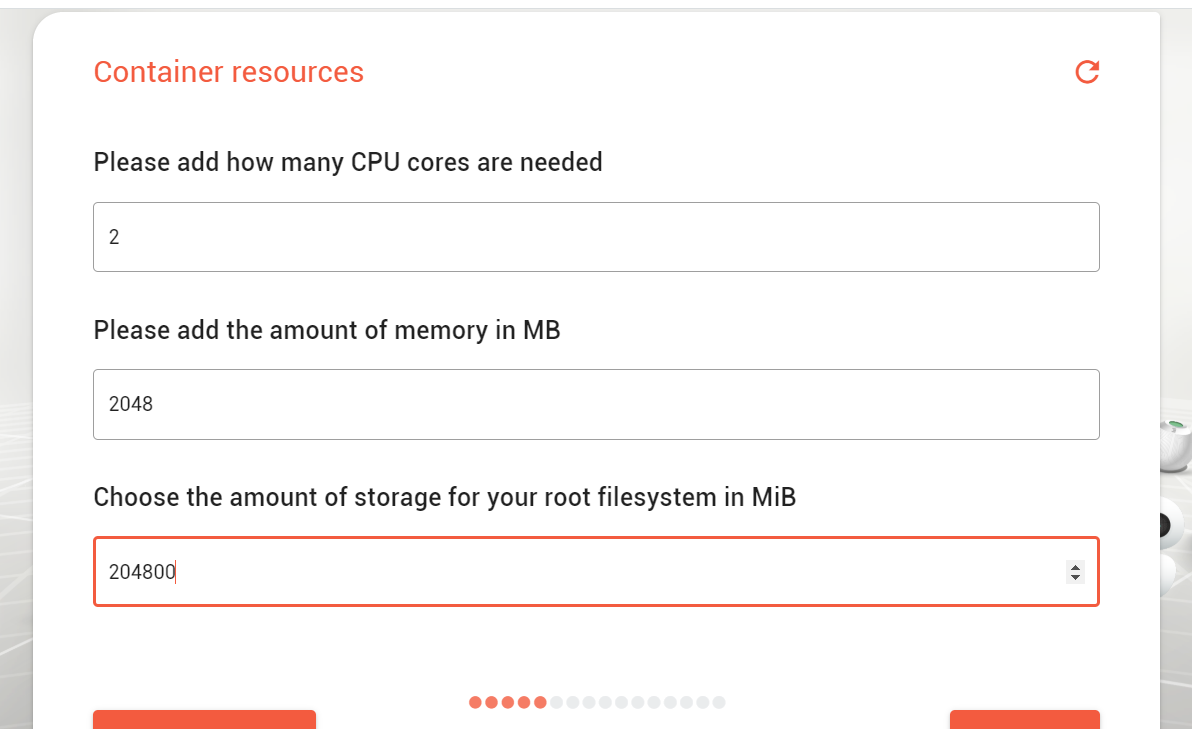
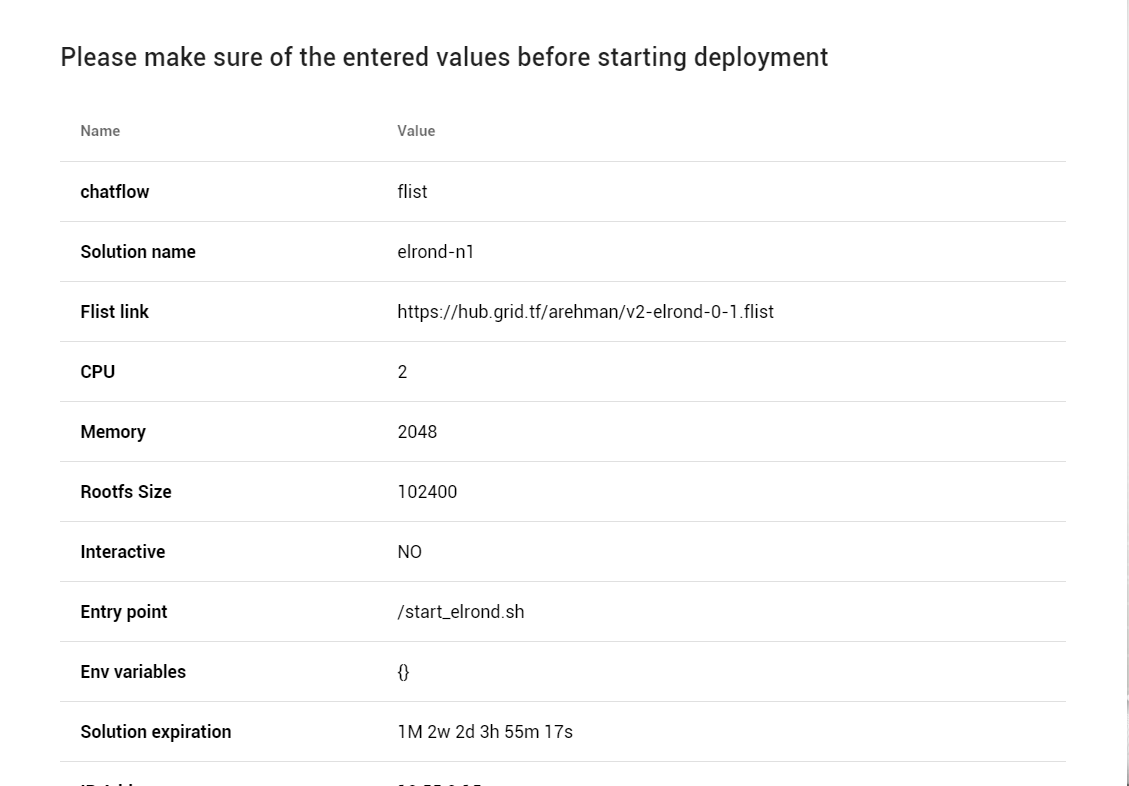
- Enter the container name, size in terms of CPU and memory . Ideally start with 2 CPUs and 2048 MB memory. You can specify the size of the boot disk / rootfs to whatever appropriate. We recommend 200 GB for Elrond Node.
- The flist link you have to use is => https://hub.grid.tf/arehman/v2-elrond-0-3.flist
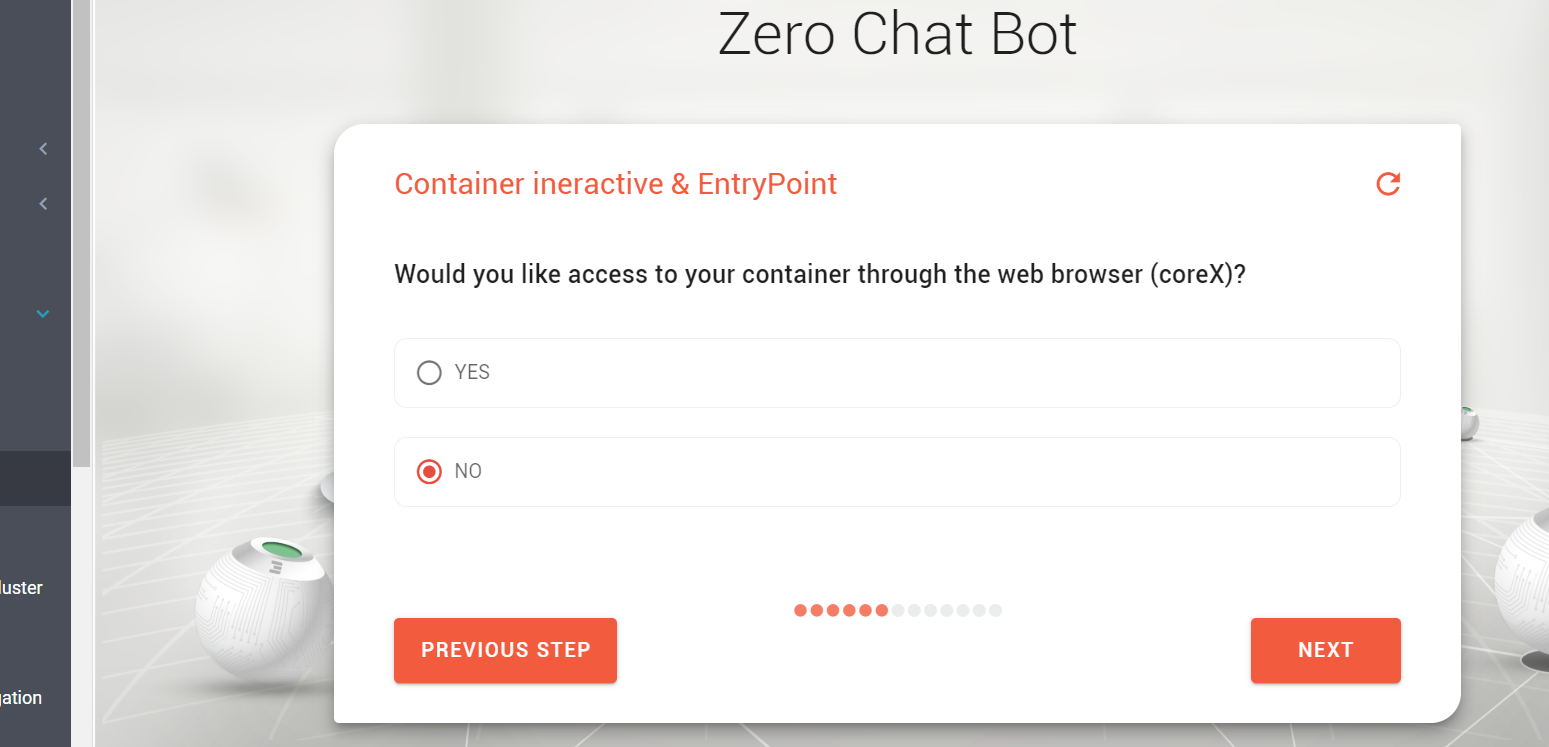
- Would you like access to your container through the web browser (coreX)? Select NO . You may want to use this for troubleshooting.
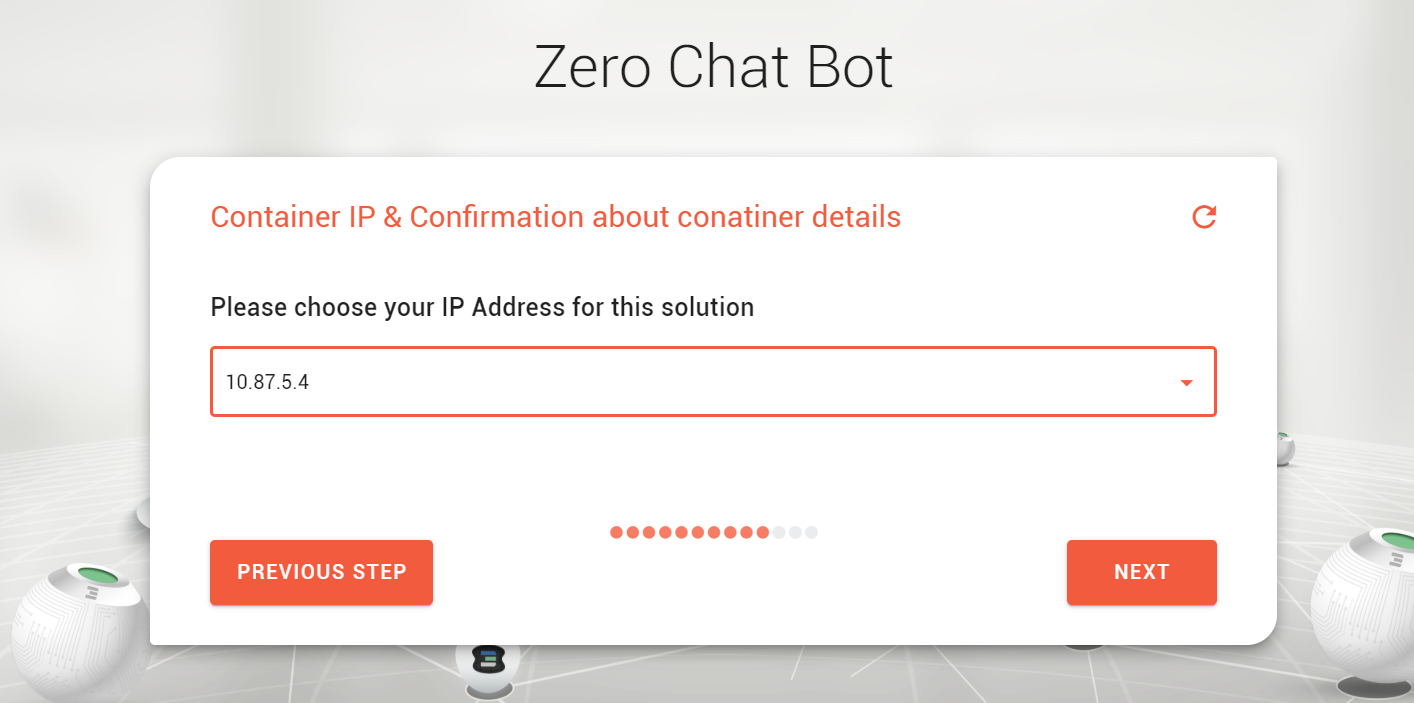
- Set the IP address from the drop down list you want to assign to your container.
- The container entry_point should be set to
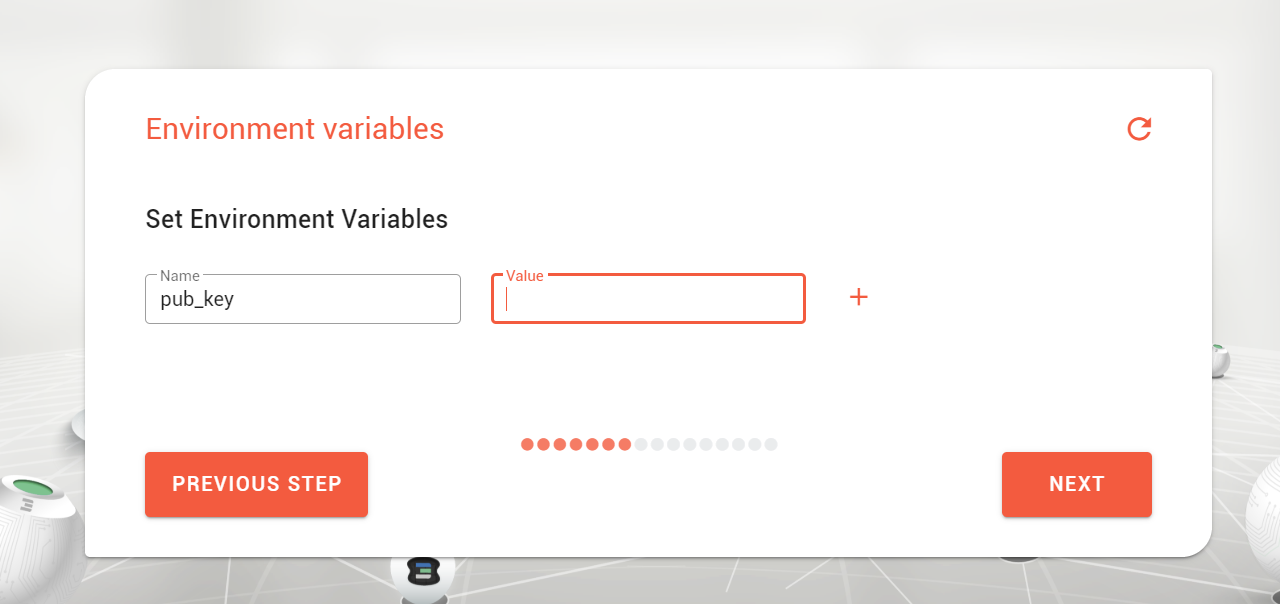
/start_elrond.sh. - Under environment variables , use pub_key=your_public_key_here . Specify an ed25519 SSH public key . This would allow to SSH into the container once it is deployed.
Choosing from the list of your available networks ( Select the one you created above )
After the Name, setup the flist as below. By the way, you can create flists out of your own docker images.
The container resources are a matter of choice, but it would good to start with below. The boo tdisk / rootfs is user defined.
Note : We can also attach persistent data volumes from the chat flows. You can dump Elrond blockchain to that attached volume. However, it is fine to skip it for now.
Elrond Data is under this this path in the container /go/src/github.com/ElrondNetwork/elrond-go/
You can set this to NO .
Setup your entry point to the container as below => /start_elrond.sh
What is the entry point ? In simple words, it is the first user defined script that the container will call once it starts ~
You can pass your ssh public key to gain access. You can also add more variables to control your application logic once you create your own images / flists.
This is the location and the farm where your container would be deployed. It is better to select freefarm or leave it empty.
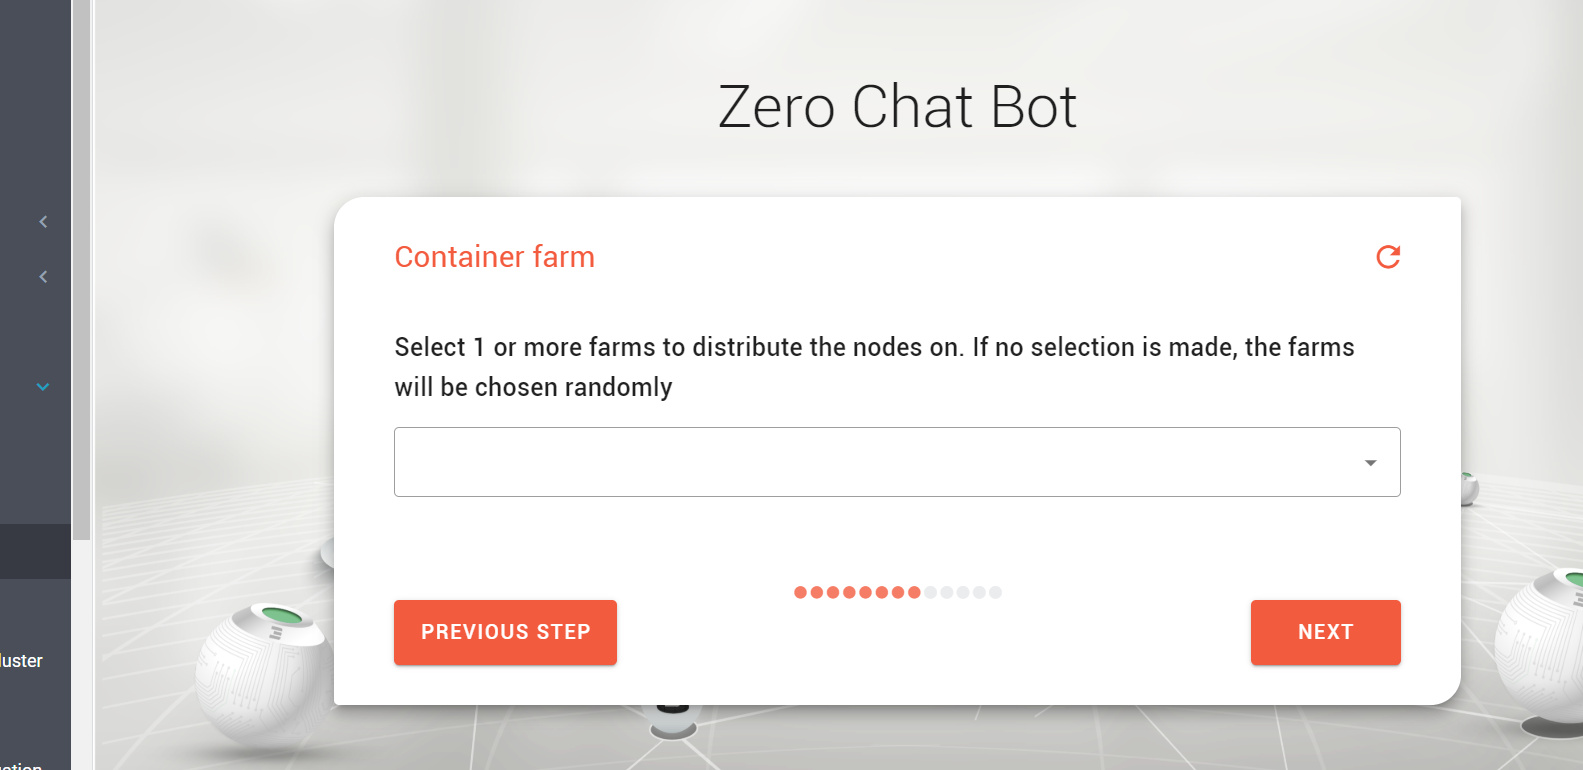
Select the expiration time and then choose the IP address of your container. This is what you will use to access the container,
Before the actual deployment happens, you get a screen to review. If all looks good, just go ahead and click Next to pay,
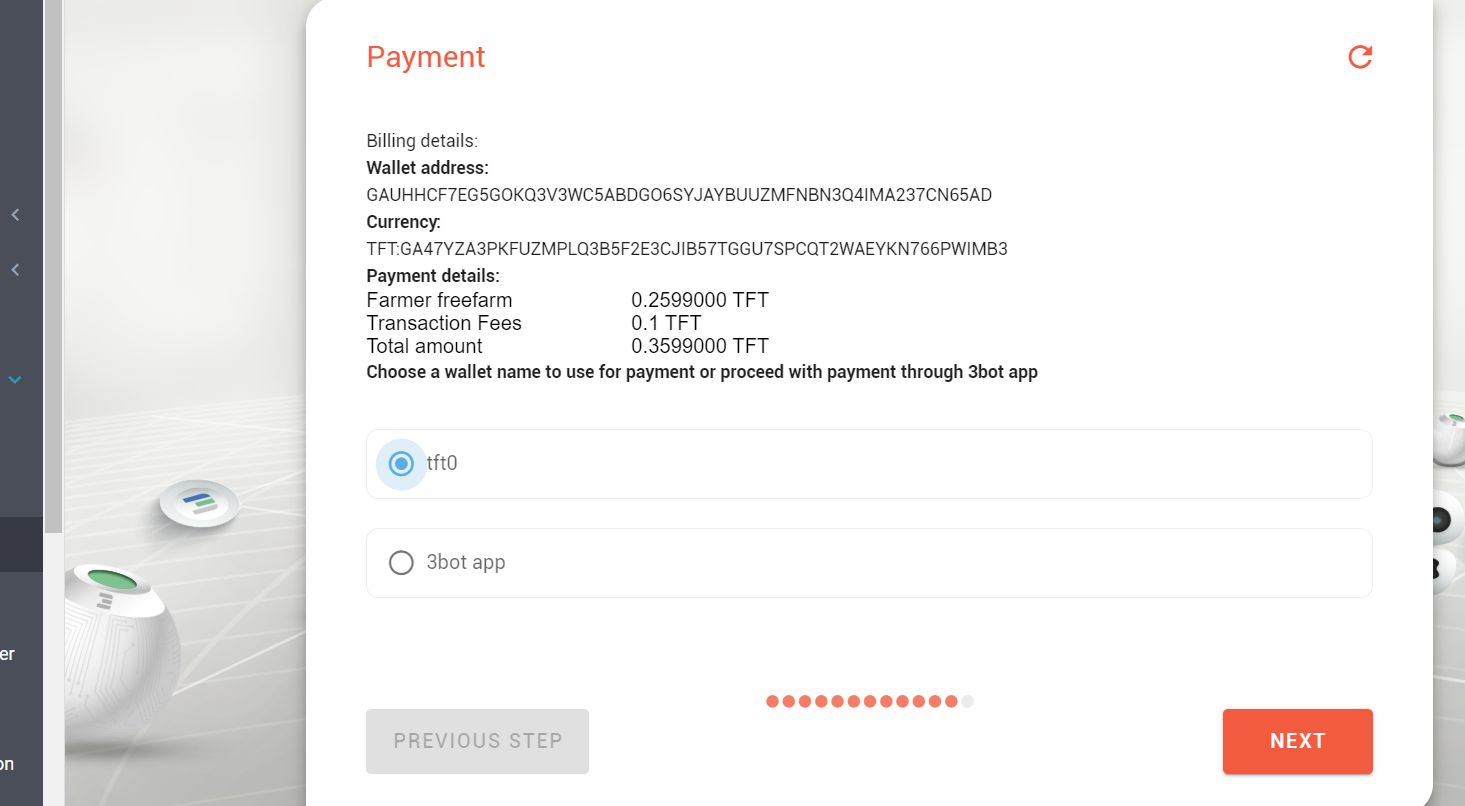
Now you have the payment screen. You can pay using your wallet you created in Step 3 or even through the 3bot App moving forward. Just make sure you have tokens there. To buy tokens, look here
If all went well, this what you shoud see in the end 
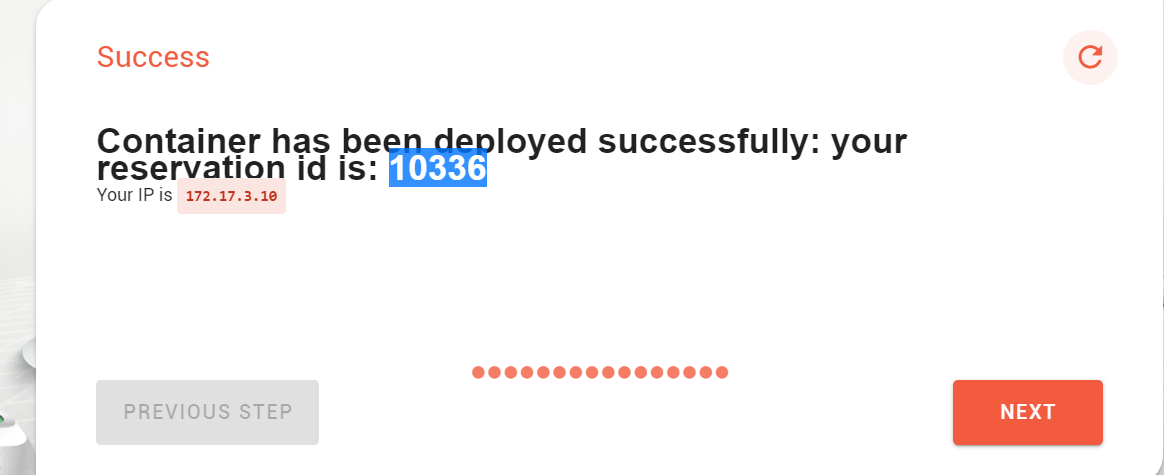
That should be it ! You will be given a reservation ID of your deployment that you can use for future references.
Step 5 - Access your Elrond Container
To access the container,
For Linux , wg-quick up path_to_wireguard_conf_file. For example, wg-quick up /my-wg/net-1.conf
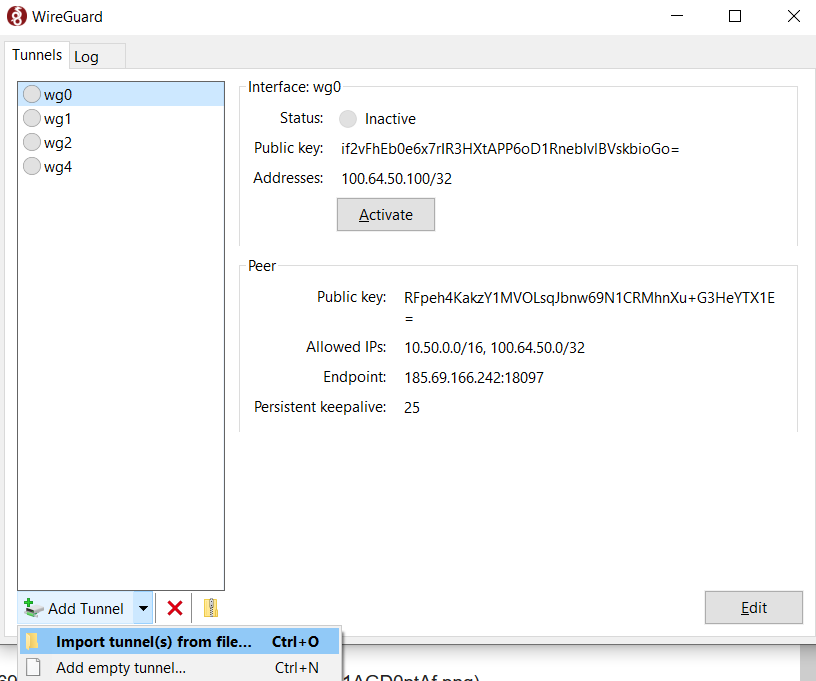
For windows , Import the downloaded wireguard configuration from Step 2,
Once the wireguard tunnel is up, you can test connectivity by doing a ping test for your container IP address. Access the container with ssh using your private key.
ssh -i path_to_your_privatekey root@container_ip_address, For example ssh -i /opt/mysshkey root@172.20.10.5
The SSH public key should be provisioned during the container deployment.
Step 6 - Verify your Elrond Node Deployment
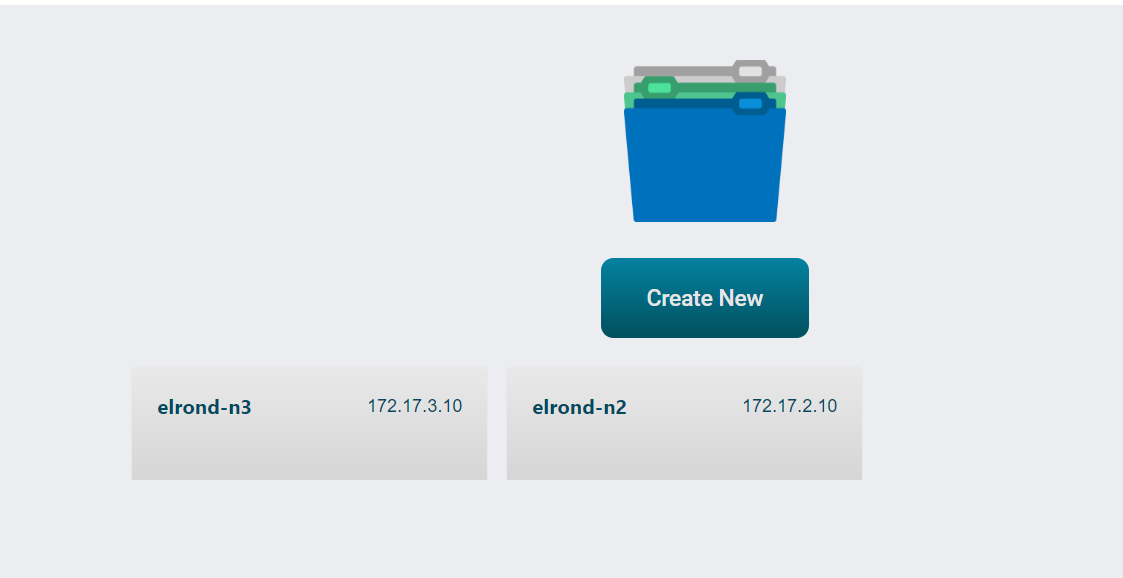
Click Generic flist again from the menu and you should see the name of your solution deployed.
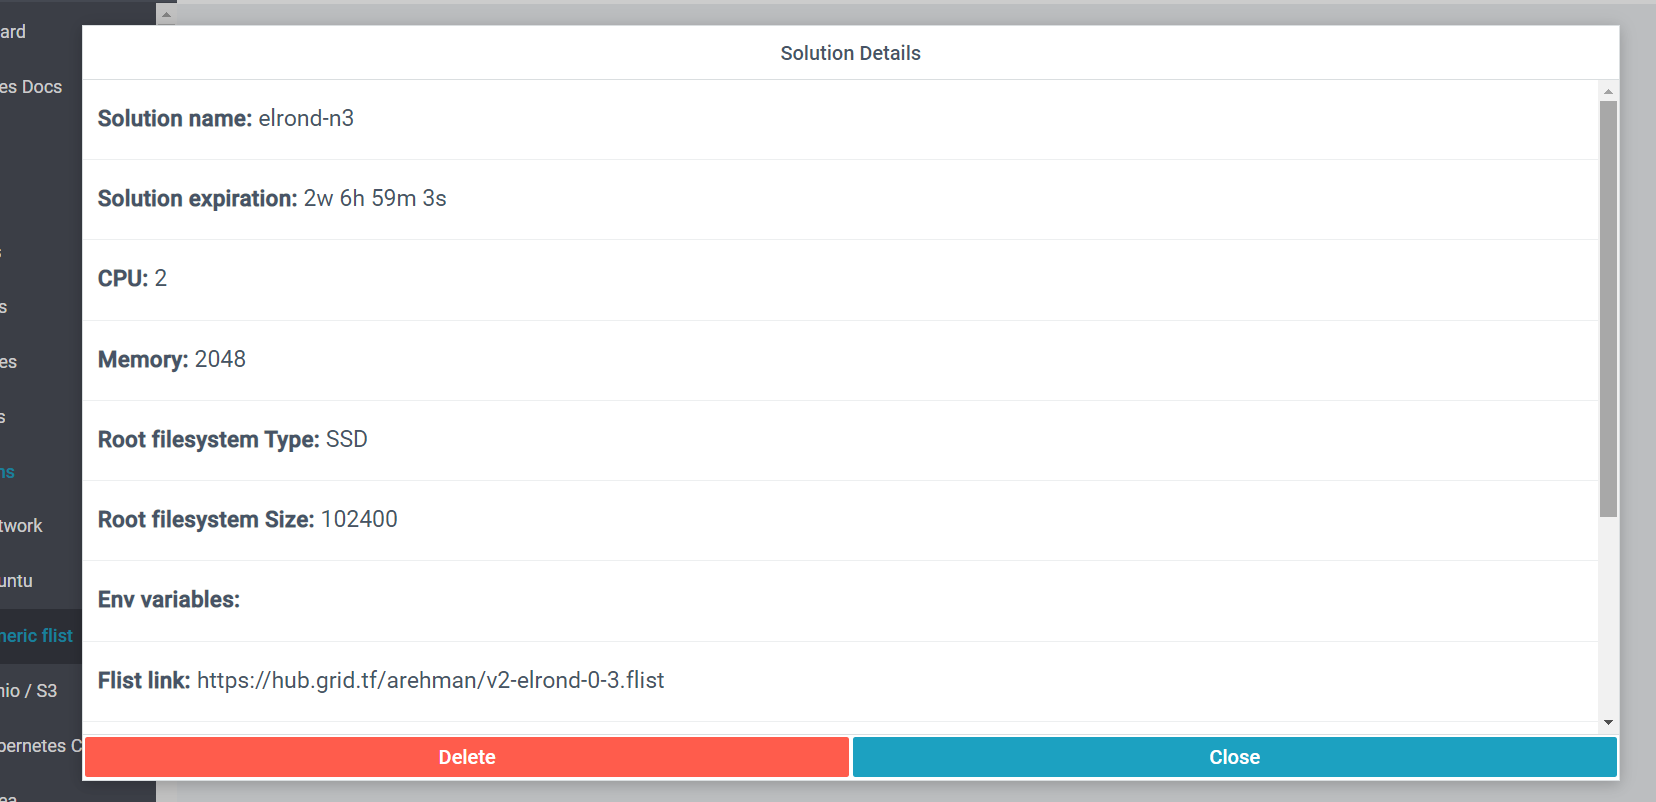
You can click it to see details of your deployment,
Now is the time to get under the hood
SSH in to your Elrond container. The configuration directory is at /go/src/github.com/ElrondNetwork/elrond-go/cmd/node/config
You can do a tmux at on the terminal and you will see the Elrond node process running with various outputs. Here is a sample screen shot,
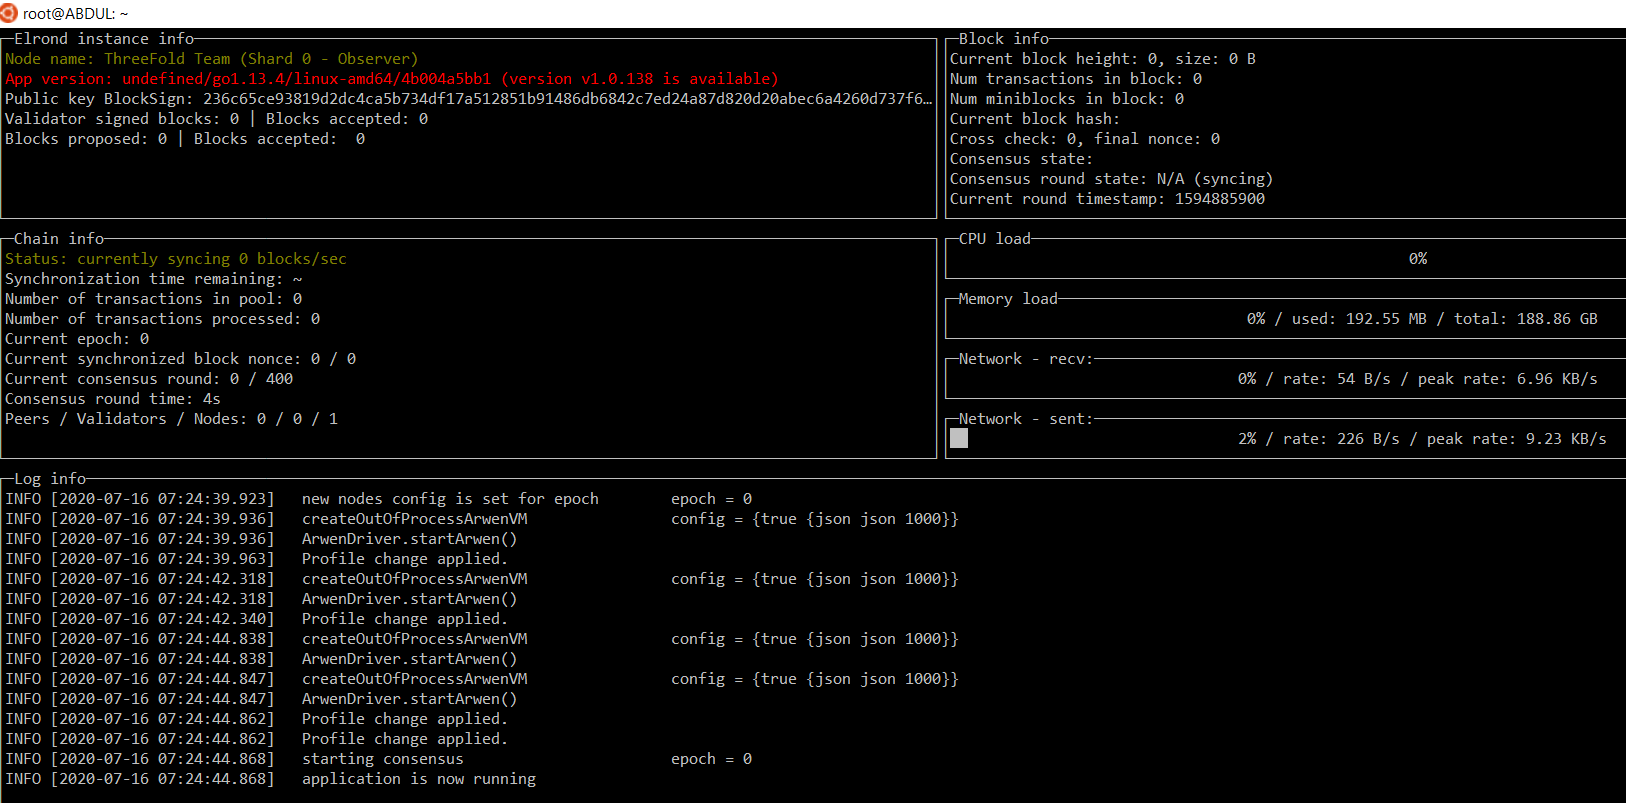
This will show the overall status of the node and sync status.
You can also verify the Elrond Node process running by a simple netstat -lntpe.
root@cluster01:/go/src/github.com/ElrondNetwork/elrond-go/cmd/node/config# netstat -lntpe
Active Internet connections (only servers)
Proto Recv-Q Send-Q Local Address           Foreign Address         State       User       Inode      PID/Program name
tcp        0      0 0.0.0.0:22              0.0.0.0:*               LISTEN      0          214785292  1/sshd
tcp        0      0 0.0.0.0:38217           0.0.0.0:*               LISTEN      0          214788193  23/./node
tcp        0      0 127.0.0.1:8080          0.0.0.0:*               LISTEN      0          214775002  23/./node
tcp6       0      0 :::22                   :::*                    LISTEN      0          214785294  1/sshd
You can verify the Elrond processes running also by ps aux
root@cluster01:/go/src/github.com/ElrondNetwork/elrond-go/cmd/node/config# ps aux
USER       PID %CPU %MEM    VSZ   RSS TTY      STAT START   TIME COMMAND
root         1  0.0  0.0  15848   832 ?        Ss   19:33   0:00 /usr/sbin/sshd -D
root        22  0.0  0.0   8588   900 ?        Ss   19:33   0:01 tmux new-session -d -s elrond ./node
root        23 10.3  0.0 4708684 188856 pts/0  Ssl+ 19:33   7:45 ./node
root        98  0.0  0.0 486116  2452 pts/0    Sl+  19:34   0:00 /go/src/github.com/ElrondNetwork/elrond-go/cmd/node/arwen
root       104  0.0  0.0 487524  3164 pts/0    Sl+  19:34   0:00 /go/src/github.com/ElrondNetwork/elrond-go/cmd/node/arwen
Generating new keys for Elrond could be done like this,
rm -f /go/src/github.com/ElrondNetwork/elrond-go/cmd/node/config/*.pem
cd /go/src/github.com/ElrondNetwork/elrond-go/cmd/keygenerator && rm -f *.pem && ./keygenerator
cp /go/src/github.com/ElrondNetwork/elrond-go/cmd/keygenerator/*.pem /go/src/github.com/ElrondNetwork/elrond-go/cmd/node/config/
cd /go/src/github.com/ElrondNetwork/elrond-go/cmd/node && tmux new-session -d -s elrond './node'
Note : This container will always start with fresh / NEW keys.
The key file name is validatorKey.pem and it is present under the path /go/src/github.com/ElrondNetwork/elrond-go/cmd/node/config
root@cluster01:/go/src/github.com/ElrondNetwork/elrond-go/cmd/node/config# ls -Ali1t
total 8
      296 -rw------- 1 root root   538 Jul 15 19:33 validatorKey.pem
       78 -rw-r--r-- 1 root root  3488 Jul 15 09:27 api.toml
       79 -rw-r--r-- 1 root root 19301 Jul 15 09:27 config.toml
       80 -rw-r--r-- 1 root root  1860 Jul 15 09:27 economics.toml
       81 -rw-r--r-- 1 root root   267 Jul 15 09:27 external.toml
       82 -rw-r--r-- 1 root root 13804 Jul 15 09:27 gasSchedule.toml
       83 -rw-r--r-- 1 root root  3161 Jul 15 09:27 genesis.json
214743622 drwxr-xr-x 0 root root  4096 Jul 15 09:27 genesisContracts
       84 -rw-r--r-- 1 root root   538 Jul 15 09:27 genesisSmartContracts.json
       85 -rw-r--r-- 1 root root  3046 Jul 15 09:27 nodesSetup.json
       86 -rw-r--r-- 1 root root  3881 Jul 15 09:27 p2p.toml
       87 -rw-r--r-- 1 root root   529 Jul 15 09:27 prefs.toml
       88 -rw-r--r-- 1 root root  2168 Jul 15 09:27 ratings.toml
       89 -rw-r--r-- 1 root root   326 Jul 15 09:27 systemSmartContractsConfig.toml
You can provide a friendly name for your node by editing this file here,
/go/src/github.com/ElrondNetwork/elrond-go/cmd/node/config/prefs.toml
Here is how we did it,
[Preferences]
   # DestinationShardAsObserver represents the desired shard when running as observer
   # value will be given as string. For example: "0", "1", "15", "metachain"
   # if "disabled" is provided then the node will start in the corresponding shard for its public key or 0 otherwise
   DestinationShardAsObserver = "disabled"

   # NodeDisplayName represents the friendly name a user can pick for his node in the status monitor
   NodeDisplayName = "ThreeFold Team"
For the changes to take effect, you may need to kill the old process and start the node again like this,
cd /go/src/github.com/ElrondNetwork/elrond-go/cmd/node && tmux new-session -d -s elrond './node'
That should be pretty much ! . We have an Elrond node running. More to follow this post.
Sources:
Elrond launches their Mainnet in about 2 weeks from now. Their documentation is pretty updated and neat. Few helpful links are herein,
To create your own docker image,
https://hub.docker.com/r/elrondnetwork/elrond-go-node
Using new scripts by elrond,
https://docs.elrond.com/validators/install
Github repository,

